⬆️ Elevate your Jeep, elevate your lifestyle!
The Rough Country 2.5" Series II Lift Kit for 2007-2018 Jeep Wrangler JK offers a perfect balance of enhanced off-road performance, durability, and style. Featuring a no-drill bolt-on installation, precision rear track bar bracket, and compatibility with up to 35" tires, this USA-made kit is backed by a limited lifetime warranty to keep your Jeep adventure-ready.
| Brand | Rough Country |
| Auto Part Position | Driveline |
| Material | Alloy Steel, Aluminum |
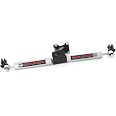
| Included Components | Brake line relocation brackets, Extended Sway Bar links, Track bar relocation bracket, Hardware, FFR/RR Coil spring spacers & Shock relocation brackets |
| Maximum Lifting Height | 2.5 Inches |
| Manufacturer | Rough Country |
| UPC | 843030111564 |
| Global Trade Identification Number | 00843030111564 |
| Automotive Fit Type | Vehicle Specific Fit |
| Model | 2.5" Series II Lift Kit |
| Item Weight | 18.26 pounds |
| Product Dimensions | 28.75 x 6.25 x 7.5 inches |
| Country of Origin | USA |
| Item model number | 635 |
| Is Discontinued By Manufacturer | No |
| Exterior | Machined |
| Manufacturer Part Number | 635 |
| Special Features | 35" tires will clear but rubbing may occur with extreme articulation, If planning on running 35" tires on factory wheels, double check clearance between the front tire, lower control arm and sway-bar links. |
| Construction | Drilling Required: No |
G**N
Here's your tool list and a couple tips
Great Product, quick shipping.You need more tools than it shows on it's tools required list.You will want to install the rear first.When you are doing the brake line extension brackets, you will need a 7/16 socket, and wrench to install the brake line bracket to the extension bracket. You will prefer a 10mm socket for removal in re-installation of the bolt that goes into the frame.When you hit the point where it tells you to remove the lower bolts for the rear sway bar end links, you will need to remove the whole thing, to install the new ones. At this point, if you do not have an impact wrench, take the top off first (19mm wrench on ball end, and 18mm socket on nut end), otherwise you'll be fighting it flopping around while trying to remove the torque nut. if you have impact wrench, remove the bottom first so you can get access to the tops with the impact wrench.Installation of the spacer is not easy, it's very tight quarters above the frame. hold that bolt and spacer up there and try to spin that nut onto it from the top. Here, an impact wrench will help you keep your sanity. trying to hold a wrench up there above the frame, in the pocket on a torque nut that's welded to a disc, while simultaneously trying to tighten a long wobbly assembly of the weighty spacer and a bolt just doesn't go smoothly.When you hit the point that you will be reinstalling the springs, I had to use a bottle jack between the axle and frame on the passenger side to push the axle down far enough to get the spring in.It doesn't tell you in the tools required list, that you will need a 13/32 drill bit to drill a hole into the horizontal surface of the bracket for the rear track bar. I used a 7/16, worked fine. you'll also be needing 9/16 wrenches and sockets at this point.When doing the front, I got to the shock brackets last. the new bolts I had left over didn't fit the crush sleeves, and they wouldn't even thread into their nuts. You will have left over bolts from the sway bar end link swaps, I used those, it worked out much better. The driver's side brake line bracket mounted at the axle by one 10mm headed screw was necessary to remove to gain enough droop on the axle to get the spring in. It re-installed fine. The driver's side brake line bracket at the frame, for the extension bracket, yeah, that was a bear.... I separated the axle breather hose and the other line from it and bent the hard brake line down, to gain the necessary stretch to bolt the extension in. The instruction called for the vehicle to be on the ground to do the sway bar end link connections. My driveway isn't flat, I do it in the air. that way I can raise or lower the axle as needed to line up the last bolt connection.Tool list should include the 13/32 drill bit, 19mm (also known as 3/4) wrench and socket(regular and deep), 18mm wrench and socket (regular and deep), 21mm wrench and socket, 16mm wrench and socket, 14mm (also known as 9/16) wrench and socket,13mm (aka 1/2) wrench and socket, 7/16 wrench and socket, 10mm socket, and a compothane hammer helps move things around without damage.
P**L
The perfect solution
This lift kit was the exact touch I was needed for my jeep wrangler. I wanted to gain some additional clearance and be able to install larger tires.Install went very smoothly with no problems at all. It was easily completed with some technical know-how and a garage space to perform the work.Once install was complete the kit came out to be a 2'' lift in the rear and 2.5'' lift in the front. While the kit is advertised as a 2.5'' kit all around, I personally like the larger spacer in the front because the kit can double as a leveling kit. My jeep no longer has that nose down appearance from the factor.With the added height I can easily clear a 35'' tire on my stock 17'' wheels. There has been no problem with rubbing or bumping of the wheels. The only time you get some slight rubbing is at full turn over at the wheel, but in normal everyday driving you rarely encounter this anyways.As for off road use, the kit seems to be holding up well and with a replacement of the OEM fenders or by shaving them down, you will have plenty of room for articulation.This kit is a great buy for the money and ease of installation. There is no need to buy fancy full lift kits for such a minor lift of only 2.5''. If you want to go larger then spend big money but if you want to improve your off road ability and turn a larger tire, without breaking the bank then this is the kit for you.
B**O
Hope this helps!
The spacer kit is for the budget builder like myself. Saves you some money while adding some lift to clear bigger tires, or get you some more room in the wheel wells for current setup. I kept my original coils and shocks, and can't tell a difference in the ride. If you're going to upgrade shocks, before buying, look for a kit without the shock relocation bracket and just buy long enough shocks(may save you a buck). Honestly though, I recommend this kit with original shocks. Installation was easy, I did it alone and it took approximately 7 hours total, including stopping several times to keep an eye on my kids in the yard, stopping for dinner, and driving it after the front was done before starting on the rear. Realistically it can be done in a couple of hours with a buddy...if you're easy on the cold ones. Also, I had a question about the hardware included, RC left a number in their instructions, answered quickly, helped me understand my inventory, and was prompt helping me out with any other questions. Photos included show a 31" tire mounted.Hope the photos are good enough to distinguish the difference, I never took intended "before and after pictures.
Trustpilot
1 month ago
3 days ago